
Well, nuts. Your WordPress website was hacked. Before you reach for your mop and bucket and start with the clean up, you need to figure out how it happened, that way, you know what to fix.
There are a ton of ways a hacker can gain entry into your website. When they do, they manage to weasel their way through your security and until you patch their entry way, they can keep coming back.
It’s like a burglar opening a window to your house and squeezing through it, bypassing your door and all the locks on it. Until you figure out they came in through the window, then shut and lock it, they can keep climbing back into your house.
Fortunately, when it comes to WordPress, there are manual and automatic ways to troubleshoot and figure out how a hacker infiltrated your website. That’s when you can patch the security hole to prevent them from coming back.
Today, I’ll share details on how WordPress websites are hacked and how to manually troubleshoot your WordPress site after it has been compromised. I’ll also show you a few automatic solutions for troubleshooting and fixing your website post hack.
How Are WordPress Websites Hacked?
How did your WordPress site get hacked, anyway? Isn’t it supposed to be secure? While WordPress itself is secure, that’s only the case when you keep it up to date.
Security patches are rolled out on a regular basis to take care of any vulnerable points of entry that a hacker could exploit to infiltrate your site. But those patches aren’t going to do much good for your site if you don’t apply them and this is done through updates.
For details, check out Why Keeping WordPress Updated is Critical and Non-Negotible.
On the Scene Like a Hack Machine
In terms of website and WordPress security, vulnerabilities are holes in security where sensitive parts of a site are left exposed in some way that can be effectively manipulated to gain unauthorized access.
Vulnerabilities are created when they’re accidentally written into code. Unfortunately, no matter how much of an expert programmer you are or how impressive your resumé is, it’s virtually impossible to never write in a vulnerability into your code. That’s why reviewing and editing any code you write is important.
So those petty people who maliciously attack WordPress sites search for vulnerabilities in the WordPress software (core), plugins, themes and scripts.
Sometimes, hackers become aware of a vulnerability by learning about one that is already known to exist. Other times, they use programs that automatically search for vulnerabilities, then are designed to exploit them. These programs are called hackbots or bots for short.
If they don’t have a bot to scan and hack sites for them, they would otherwise need to do this manually. Excuse me while I get a tiny tissue to wipe away this invisible teeny tear at the corner of my eye.
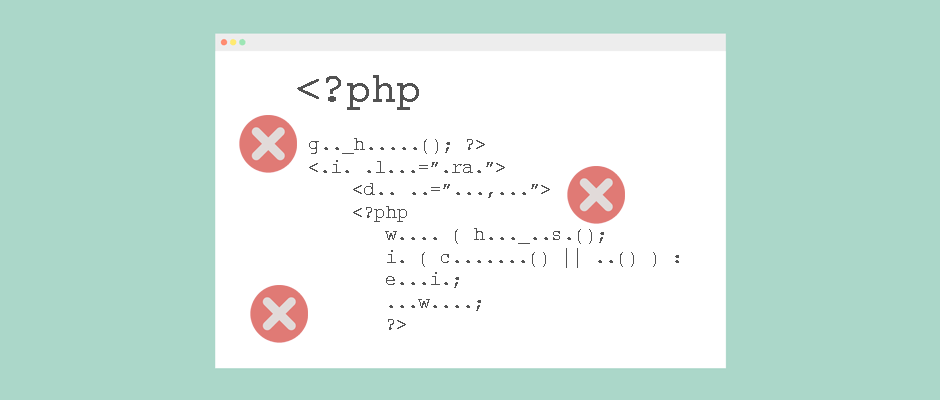
Security vulnerabilities can be easily and accidentally written into code.
What a Wicked Game You Played
According to WP WhiteSecurity, there are three ways that hackers most commonly infiltrate a WordPress website:
- Plugins – Vulnerable plugins account for 54% of hacked sites.
- WordPress core – The WordPress software not being updated accounts for 31.5% of hacked sites.
- Themes – They’re responsible for 14.3% of hacked websites.
Vulnerabilities can also be found in scripts that are similar to plugins in that they provide enhanced features for your site, but they’re implemented differently.
Security in an Insecure World
There are also many other security concerns that could lead to your site getting hacked:
- Human error can create vulnerabilities outside of code such as using improper file permissions or “phalling” for phishing scams.
- Your website is hosted on an insecure server.
- You use insecure email and after it’s infiltrated, a hacker can collect personal information such as login credentials or use it for spam. If you host email on the same server as your website, a hacker could also gain forced entry into your site that way.
- If your computer has a virus, it can spread to not only your files, but your website as well.
- If you use an insecure internet connection, it can be hijacked or otherwise used to spread a virus that affects your computer and website.
It’s important that you scan your computer and email for malware regularly and also after your site was hacked. If viruses were found, they could be the potential culprit and should be removed immediately with anti-virus software.
This is also why it’s important to password-protect your internet connection and avoid logging into your site when you’re using the free Wi-Fi at your favorite coffee shop.
Keep in mind that if you logged into your site recently, then visited any page of it using a public internet connection, your website is still vulnerable to a hacker.
The Most Common Types of Hacks
When a vulnerability is found and exploited, it’s called a hack. Unfortunately, there are a ton of different vulnerabilities that could be exploited.
Here are the most common types of hacks that are implemented to gain unauthorized access to WordPress sites:
- Brute Force – When hackers manually try to guess your login credentials and log in. This also applies to hackers manually logging in after stealing your credentials through a phishing scam since not all phishing attacks target login details.
- Malware (Viruses) – A malicious script.
- Backdoor Exploits – Malware that is uploaded to your server which allows undetected and unauthorized entry to your website. As long as the file remains on your server, the hacker can get in.
- Script / Malware Injection – When malware is uploaded to your server. A backdoor exploit is a type of script injection attack.
- XSS (Cross Site Scripting) – A type of script injection attack where a hacker is able to inject and execute code from the front end of your site. Then, they’re able to hijack a visitor’s browser and take control of it. This is typically done through a poorly coded plugin, theme or input field from a form.
- CSRF (Cross-Site Request Forgery) – Another common type of script injection attack where a hacker can inject code or strings into the URL of a site. Then, they share that link to unsuspecting victims such as the site administrator. When the victim clicks on it, data such as login details or other personal details are sent to the hacker.
- XML-RPC – This is a legitimate application program interface (API) that’s used to form the WordPress API. It’s used to send trackbacks and pingbacks as well as load parts of some plugins that use it, and is often exploited by hackers. They use it to execute a ton of commands with only one HTTP request.
The list goes on and on and with so many ways WordPress could be hacked, you can’t just guess how it happened. You need to troubleshoot the issue to actually fix it.
Otherwise, you could be “fixing” the wrong part of your site and the hacker can keep waltzing right in to muck it up some more.
It’s like trying to change the oil in your car and hoping it fixes the fact that your transmission has failed. As nice as that would be if it worked, it isn’t going to happen.
Fortunately, there are ways you can manually and automatically troubleshoot your hacked WordPress site.
Knock Out Hackers with Updates
First thing’s first. Check if you haven’t updated your site recently such as before it was hacked. If you didn’t and there are updates available for core, plugins or themes you have installed to patch a known vulnerability, update them immediately.
That very well may be the cause of the attack. If it is the culprit, updating your site should successfully seal the vulnerability and you can start cleaning up your site.
Keep in mind that you should still troubleshoot further in the off chance that this wasn’t the cause.

Updating WordPress can help patch security vulnerabilities.
Help! I Need Some Logs, Not Just Any Logs
To manually troubleshoot your hacked WordPress site, you need to check your access and error logs.
It may be important to note that they typically only hold 24 hours of data so you need to check your logs as soon as you find out your site was hacked.
Accessing Your Log Files
These log files aren’t always named or accessed the same way depending on where you host your WordPress site. If you’re not sure where to find them, it’s recommended that you contact your host.
It may be important to note that if you do contact your host and tell them your site was hacked, they may immediately shut down your site or server as a precaution. This is because the hacker could work on gaining entry to other parts of the server where other customer sites as hosted.
Understanding the Data in Logs
There are three main kinds of data you need to focus in on when accessing your logs: errors, successful accesses and files that were uploaded.
It’s also important to know how the data in your logs are organized:
- The IP address of the user
- The date and time
- HTTP method used along with the version
- HTTP response code (an error number such as 400, 403 and the like)
- Number of bytes that were received
- Referring software (such as the browser or device OS)
- User agent (The person or bot that accessed your site)
Here’s an example of a line in an error log to give you an idea of what to expect:
[Fri May 06 23:14:24.856758 2016] [core:error] [pid 27290] (13)Permission denied: [client 12.345.68.90:33106] AH00132: file permissions deny server access: /path/to/your-site/.htaccess
Lines in your access log appear similar to this as well in that they follow the same order to display the data.
By looking at key points in this data, you can start to determine who hacked your site and how they did it.
Errors to Search
You need to look for the following types of errors since they can indicate that your site was under attack:
- 400, Bad Request – The user has made an error including an invalid request or syntax error.
- 401, Unauthorized – Login credentials were needed to access the page, but the user didn’t enter any or used invalid details.
- 403, Forbidden – This error is the same as the 400 HTTP response code, but with one key difference: the server decided to deny access to the user.
- 429, Too Many Requests – If you have a plugin that counts the rate limit for requests and this error appears, it means the limit has been reached. It could indicate that a hackbot is flooding your site with traffic trying to gain unauthorized access. Since the rate limit is often set high enough, regular users aren’t typically going to run into this error.
By themselves, these errors occur from time to time and it’s not a huge cause for concern. However, if you see a huge number of these errors in your logs, it could indicate a hack attempt.
If there are a ton of error spaced out, then it could be a hacker manually trying to gain entry to your site. If the errors appear in rapid succession, that’s usually the calling card of a hackbot.
One of the only real exceptions to this is if one of the plugins or themes you have activated are broken or not working properly.
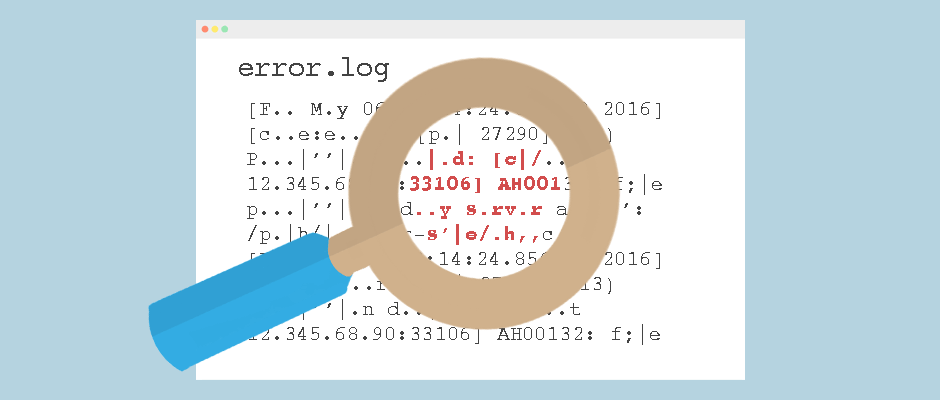
Your website’s error log can give you clues to who hacked your site and how they did it.
Successful Access
If you notice someone that wasn’t you was able to access the backend of your site, then that could have been the point where the hacker was successful.
Keep in mind, you should rule out anyone else who has proper permission or admin access such as your team or a developer.
You can help narrow down which successful access was a hacker by the IP address that’s listed. I’ll go through this in detail later.
If you see a large list of errors such as the ones described above that are (almost) directly followed by successful entry, then there’s a strong chance you have found the moment you were hacked.
Uploaded Files
It’s also important to look for any files that were successfully uploaded to your server. Similar to checking for successful accesses, rule out any files that you or any authorized person uploaded.
If you see that a file was uploaded after a long list of error codes, then it’s all the more likely that it’s a hacker.
It’s also important to look for file names that are definitely not a part of the WordPress core software or the plugins and themes you have installed on your site.
It may be important to note that the file names could be incredibly similarly named to real WordPress, plugin or theme files so you need to be vigilant and cautious. Hackers do this to try and trick you into thinking it’s a legitimate file.
For example, you may see a file called wp-settings-admin.php instead of wp-settings.php in the root of your WordPress site.
You can check your existing files against the WordPress Files List in the Codex to see if you have one or multiple extra files that are backdoors.
Also, download a fresh copy of the plugins or themes you have installed and unpack them on your computer. Look at the list of files that are included and check them against the files that you have on your live server. Check that there aren’t any extra files that don’t belong there.
If you find any suspicious files, you can double check their contents. If they contain a line that looks like eval($_POST['hacker-key']); or eval(base64_decode("hacker-key")); where hacker-key is a long string of letters, numbers and characters, then it’s a backdoor exploit.
If you find one or more files like these, you can safely delete them when you’re working on cleaning up your site.
Filtering Out Legitimate Visitors
One of the most difficult aspects of searching through your logs is having to look through a sea of legitimate regular users accessing your website. This is especially difficult if you have a high-traffic website.
Fortunately, there is a way you can filter out all your legitimate users and visitors to help narrow down the hacker that accessed your site. You can use SSH grep commands to filter out all the real files that are loaded every time someone visits your site such as CSS stylesheets and images.
For details, check out Ask Sucuri: How Did My WordPress Website Get Hacked? – A Tutorial.
Filtering out legitimate users can help you sort through your logs and narrow in on the hacker.
Searching through Your Log Files
Within the three main types of data look for, there are additional points to search:
- The date and time
- The type and description of any errors
- The URL of the affected page to which a user was referred
- The path to the file that was hacked or where there was an attempt
- The user’s (hacker’s) IP address, which can be determined when you notice that a malicious file was uploaded or your site was accessed by an unauthorized user, for example.
All this data can help you weed out the last of the log entries that you’re not immediately able to determine whether they’re legitimate.
Keep in mind that if your computer or internet connection was hacked, either could be used to access your site’s server. This means that you may not necessarily be able to rule out log lines that contain your IP address, unless you’re absolutely sure your computer wasn’t hacked.
To be sure, perform a full scan of your computer with a trusted anti-virus app.
Opening a Cold Case
If it’s been a while since your WordPress site was hacked and your log files no longer report back that far, you can still check your logs for evidence.
Once you’ve been hacked, there’s likely still continual access or errors resulting from the incident. This data can still give you hints as to what has happened.
After it’s been some time, the data you need to search for in your logs is still similar:
- Focus on finding successful accesses to your site that aren’t you or other authorized users. The hacker may come back after the fact, especially if a backdoor exploit has been uploaded to your server.
- Check for any files being executed that aren’t a part of the WordPress core or the plugins and themes you have installed.
- Also, check if legitimate files are suddenly and unexpectedly failing or seeing errors. Be sure that the file isn’t broken by visiting the corresponding plugin or theme’s website. Check for known issues. You can also test the plugin or theme in a staging or local environment to make sure everything should be working.
While it’s more challenging to find out how you were hacked with this method after the trail has run cold, there are still other ways you can do some sleuthing to figure it out.
I Still Haven’t Found What I’m Looking For
If you’re not able to find anything in your logs, you can check your MySQL database for changes.
Typically, log files aren’t enabled by default, though, your hosting provider may have turned on this option for you if you have a managed hosting plan.
Each host is a bit different so if you’re not sure where you can find your logs, contact them directly.
Keep in mind that you’re going to need root access and SSH to access the logs. If you don’t have both of these enabled in your hosting plan, you may be able to request the files from your host.
You need to search through two different files: error and general logs. The error log contains exactly what you would expect it to—a list of the errors that occured on your website. The general log is where you would see all the attempted and successful times users were able to access your website. In other words, it’s the name MySQL uses for an access log.
The goal here is to search for the same criteria outlined above including any successful entries to your site by a suspicious user, unknown files that have been executed and legitimate files that are consistently and unexpectedly failing.
It’s also important to check for these possible instances:
- Check the admin or user tables for changes or tampering
- Search other tables for changes or successful access since a lot of sensitive and private information is stored in the database such as passwords, email addresses and the like.
In the MySQL logs, the data is arranged in the following pattern:
- The date – as a string of six numbers. The first two indicate the year, the second two for the month and the last two show the day. If another incident happened on the same day and the exact same time, only the first line will show a time stamp.
- The time – Displayed in military time, with seconds.
- Type of data – This could be an error, note or a successfully executed query or connection.
- Description – A description of the error is shown or the path to an affected file or table with a description of the action that took place such as the server being shut down, for example.
Here’s an example of a line in a MySQL error log to give you a better idea of how data is organized:
170919 22:38:54 [ERROR] Fatal error: Can't open privilege tables: Table 'mysql.host' doesn't exist
If your logs aren’t yet enabled, all hope isn’t lost. You can enable them now and check them every so often searching for the same data.
For details, check out 5.4 MySQL Server Logs and 5.4.2 The Error Log.
You MySQL database may also have log files you can search through.
Automatically Troubleshooting WordPress
Sure, you could spend a ton of time troubleshooting your hacked site manually. You can search through your server and database’s log files, but there’s a simpler and faster way to get the job done.
You can automatically troubleshoot using a security plugin such as Wordfence, Sucuri Security, Defender or iThemes Security.
These are all great options, but it’s important to understand that even if a security plugin tells you what’s up, it could be a false alarm. It may also be unable to actually fix the issue if it’s not a straightforward one.
Plus, it doesn’t always stop the vulnerability from being there. While it may do some clean up, it may not actually patch the vulnerability and you would still need to do that. Otherwise, the hacker could still exploit the original vulnerability to hack your site again and again.
The best way to ensure your site automatically patches up security vulnerabilities as well as thoroughly cleans it afterward is to get a dedicated developer to do it for you.
The downside is that this can get expensive quickly.
Wrapping Up
When your WordPress site has been hacked, it’s important to do some troubleshooting to pinpoint where things went wrong. Narrowing down the problem this way helps you zero in on exactly where the hacker breached your security so you can fix it once and for all.
You can manually troubleshoot the hack by searching through your error and access logs, but you can also automate the process with security plugins.
Or better yet, you can get a maintenance plan to automate everything and fix your site after it’s been hacked once and for all.
Do you suspect that your website has been hacked? How do you think it happened? Are you running into troubles figuring it out? Share your experience in the comments below.
Read other posts about:
Leave a Reply


Discover your innate talents and embrace them as the foundation to personal and business success. Walk away with personalized tips to help you overcome the mental hurdles unique to your brand builder personality.
What’s your brand builder personality?
Take the quiz
As seen in & heard on
")


Leave one here
Comments